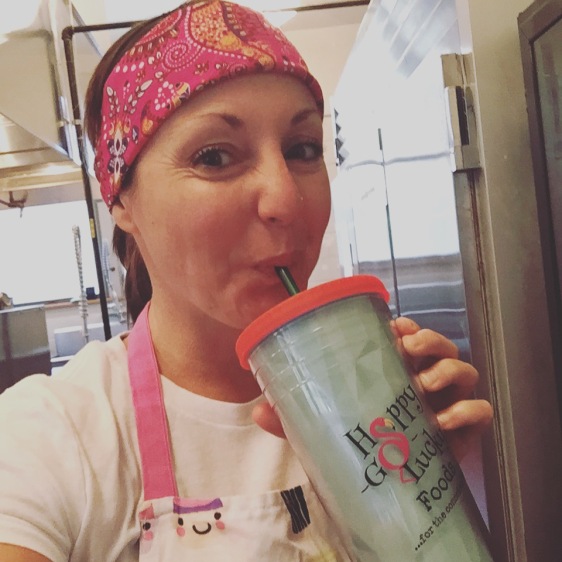
Memories of Home

It’s been two whole years since moving to the mountains of western NC from the beaches of sunny Florida. Was it a whim? Maybe. Was I sure I’d stay? No. Am I glad I made the leap? Absolutely. Do I miss home? Definitely. 

So much has transpired since our move…which accounts for my blogging absense. Happy-Go-Lucky Foods, the grand granola empire (well, not really, but we’re on our way) is doing better than I imagined. We’re about to start building a home, and are ready to start a family. My wonderful hubby has settled into his new teaching career at a local university and is loving life. And we love hiking in the woods along the Appalachian Trail and taking in the views. All is well, and we live in a place that few are fortunate enough to call home…

…but I have saltwater running through my veins; I’m a beach girl. I do miss our Florida home. I miss our friends, family, and our old favorite spots all up and down Daytona Beach.  And I miss our house. And I miss our street. And I miss our neighbors. But I now have the most perfect and gigantic thing to make me smile:


See this? This truly makes me happy.  The awesome people behind Modern Map Art create maps that are simple and beautiful. I’m so thrilled to have this right in our living room. And they have cities from all over the world! Just choose your location, color, and size, and that’s it. Transplants like us will always have a piece of home.

And now we don’t feel so far away. 

With love,

Jenna 

Crispy, Sweet, Addictive Roasted Chickpeas 

Ever have a ton of leftover chickpeas just staring you in the face every time you open the fridge? Oh boy, we do. We pressure cook a ton of these protein-filled babies to eat throughout the week in salads, with breakfast, and of course to make hummus with. But they’re like damn starfish arms. Eat some, and they regenerate. Eat some more, and there they are again! I swear. I don’t understand. BUT it’s ok because now I’ve found the best way to devour them all. Each. Little. Tiny. One. 

This is easy peasy. Ready?

1. Take some leftover cooked chickpeas. Salted is ok, but no garlic, onions, or other flavors. Rinse and dry them really well. I used about 3 cups worth for this recipe. (Feel free to use canned chickpeas, too. Two cans should do. Make sure to rinse and dry as well.)

2. Lay them all out on a parchment-lined sheet tray. Preheat oven to 400 degrees F.

3. Roast for 30 minutes, giving them a shimmy every 10 minutes to avoid burning on one side.

4. Remove from oven and let cool on the sheet tray. Bring the temp in the oven up to 325 degrees F.

5. While the chickpeas are cooling, melt 1/4 cup coconut oil in the microwave or over the stovetop on low.

6. Add in 2 tbsp brown sugar (we make our own using cane sugar and blackstrap molasses), 2 tsp cinnamon, and 1 tbsp of maple syrup to the warmed and melted coconut oil. 

7. Whisk this mixture together once the coconut oil is melted, drizzle it over the chickpeas, and toss. Make sure each little chickpea gets some love.

8. Put them back in the oven and roast at 325 degrees F for 10 more minutes. 

9. Remove from the oven, and sprinkle with a pinch of kosher or sea salt. Himalayan salt would work, too. Let cool completely. 

10. If you haven’t eaten them all by now, transfer these sweet, maple-y, cinnamonn-y, and salty chickpeas of love to an air tight container. I’d eat them within a few days (if you can refrain that long.)

See? That’s it. No more wasted chickpeas. Hurray!

My foray into foraging…

(Friendly caveat: I’m not advising anyone to forage. This blog post is about my experiences as a novice forager.)

Within the last six months, I’ve gotten into eating wild food. More importantly, I’ve learned the joys of sustainably foraging. As a lot of you know, organic gardening is a huge part of my life.  Eating with the seasons, caring for the health of our Mother Earth, and growing the food that nourishes my little family is an inherent part of my identity. Foraging is just another facet of that. 

I have a wonderful friend who is from the Appalachians. She has a degree in biology, she’s an organic farmer, a homesteader, and a consummate steward of our planet. She knows more about our local flora and fauna than anyone I know. Megan is teaching me how to identify edible fruits and plants and how to harvest them sustainably. If I didn’t have her, I wouldn’t be foraging. It can be quite dangerous if you don’t know what you’re doing or where it’s legal to do so.

I’ve learned enough to do some basic foraging for things that are pretty easily identifiable. 

So far, I’ve found wild ramps…

…morel mushrooms…

…tasty little wild strawberries…

…and wild black raspberries…

Recently I’ve spotted some sweet patches of blackberry bramble, and I’m salivating at the thought of eating them still warm from the sun. 

Foraging is the ultimate way to eat with the seasons. It’s exciting, it’s cost-effective, it’s a wonderful way to get outside, but it’s imperative to be safe. Eating things that grow wild can be dangerous if you don’t know what you’re doing. Go with a knowledgeable guide or do a lot of reading on the subject before eating something you’re not sure of. And if you’re not sure, DON’T EAT IT. And don’t forage on private lands or in parks that prohibit it. And don’t eat things from roadsides or other places that have been sprayed with herbicides, fungicides, or pesticides. (I know I’ve mostly just said “don’t,” but this is about my experiences as a novice forager and advice I was given.) 

I just want you to be safe, my lovelies. 

Until next time,

Jenna the Happy Forager

Yay for Gloria Jean’s Coffees!

Who doesn’t love coffee? Better yet: Who doesn’t love awesome coffee? Better still: Who doesn’t love awesome, coffee that comes from a company who cares? Answer? You do, of course.

I’ve been drinking Gloria Jean’s coffee for what seems like forever. It wasn’t a trip to the mall without a delicious GJ iced coffee in hand as I rifled through clothing racks (sale, of course) or leafed through new CDs. It was tradition. And it’s still as good as I remembered…if not better.

This morning, in fact, I enjoyed a Red Velvet Cupcake iced coffee with coconut milk and lightly sweetened with a coconut palm sugar syrup. I had a cupcake for breakfast (well kinda)! See how happy I am?

image1-4

And what makes this coffee taste even better is that Gloria Jean’s Coffees has been working with the Rainforest Alliance since 2007. Their entire line of flavored coffees, regular and decaf, contains Rainforest Alliance Certified beans. They support a healthy planet, stronger forests and an improved quality of life for farming communities. The eco-nerd in me is glowing. For more information on Gloria Jean’s Coffees and the Rainforest Alliance, click here.

From the  Classic Origin Ethiopian Yirgacheffe to the Limited Edition Red Velvet Cupcake, GJ knows their beans. And look how cute their camping-inspired mugs are!
image1-3

Maybe it’s the caffeine talking, but I’m in the mood for a couple of java-themed posts for my coffee-loving friends out there in the blogosphere. (You’re actually sipping a hot cuppa right this very minute, aren’t you?) I’ll be doing one on the perfect vegan iced coffee featuring the Gloria Jean’s Red Velvet Cupcake and then another on a homemade BBQ sauce featuring the Ethiopian Yirgacheffe.

If you want to be uber prepared for the upcoming recipes or just can’t wait to get your hands on some of this amazing Gloria Jean’s Coffee, click here. Until next time, my friends…

Baby Greens & Roasted Beet Salad

  
The busier I get, the more simply I find myself eating. I keep certain staples on hand, and, these days (and with the abundance of fresh organic produce Asheville and western NC has to offer) it’s lots of roasted veggies. Beets are one of my favorites, and they star in this super healthy salad. 
Ingredients:

  • organic baby greens (they’re all good, so take your pick)
  • thinly sliced onion
  • roasted beets, chilled and cut in bite sized pieces
  • raw pecans, chopped
  • balsamic vinaigrette (see below)
  • drizzle of sriracha (optional)

Method:

Add all ingredients to the bowl, and use your judgment for how much of each you want. My only recommendation is to make sure you have plenty of greens to balance out the other things. Oh, and don’t overdress the salad! Go slowly and mix gently as to not badly bruise the greens. 

Balsamic Vinaigrette:

  • 1 cup good olive oil
  • 1/2 cup balsamic vinegar
  • 1 teaspoon kosher salt
  • 1 teaspoon cracked black pepper
  • 1 teaspoon honey or agave (for vegan option)
  • 2 cloves minced garlic

Method:

Combine all ingredients in a mason jar or other tightly lidded vessel and shake, shake, shake. Refrigerate leftovers. (By the way, this dressing is a super marinade.)

See how easy that was? Now you’ll know what to do with those leftover beets. Happy and healthy eating!

Don’t Toss the Microgreens from Your Organic Garden!

Hey, all, I was doing some gardening today when I realized how many times I’ve tossed seedlings that I’ve thinned. About a year ago, I realized that I was just tossing nutrient-rich microgreens. From arugula to kale to spinach, and all types of lettuce, they’re all edible and delicious! I especially love beet seedlings. I used to toss them because I only got about a handful. But that’s more than enough to use as a garnish on top of seared salmon or to add to a salad. They’re loaded with vitamins, nutrients, and flavor. I’ll keep this short: don’t toss the microgreens. Just wash and enjoy.

Pucker Up: Perfectly Pickled Banana Peppers 

Last weekend, North Carolina got pummeled with a ton of rain. The farmers market got rained out, there was no going and playing outside, and the only thing left to do was pickle everything in the refrigerator.

My fiancé’s mom came to visit from Michigan, and she brought with her a whole slew of pale yellow banana peppers that she had just picked from her garden. (And potatoes, and a 16″ zucchini, tomatoes, and gorgeous onions.) As soon as my honey saw those peppers, he said “let’s pickle them.” Any fervency in the vegetable direction gets no argument from me. So, they were saved…despite my wanting to immediately devour at least half.
With pickled lots and lots of things in the past. From cucumbers it to beets to carrots and celery, we’ve always come up with a new recipe for each. But the last time we pickled jalapeños, the recipe was nearly perfect. We decided to make a few tweaks this time, and the result was flawless.

For this recipe, you’ll need:

  • Five 6″ or larger banana peppers cleaned, seeded, and cut in rings 
  • One cup white vinegar
  • One cup water
  • 3 tablespoons kosher or pickling salt
  • 3 tablespoons white sugar
  • Any or all of the ingredients from the optional list below

Optional:

  • Bay leaf
  • Few garlic cloves
  • Peppercorns
  • Hot peppers prepped the same way as the banana peppers (we added two jalapeños for a bit of kick, but one nice Datil pepper would be awesome, too)

Method:

Prep the peppers if you haven’t already.


Place the vinegar, water, salt, sugar, and any spices you choose to use in a non-reactive saucepan. I use my trusty old nonstick. Bring to a boil over high heat.
  

Once the mixture comes to a boil, add the peppers, put the lid on, and set a timer for 12 minutes. Remove the pot from the heat source. I just move mine to another burner.


Make sure you have a mason jar or other clean vessel for when the timer  dings. A heat-safe glass jar is my favorite.

Once the timer dings, carefully transfer the peppers to a jar with tongs and then very carefully pour the liquid over the top. I like to strain mine to avoid any seeds, but you don’t have to.  NOTE: Feel free to let them cool as long as you’d like so you’re comfortable handling them. Remember, though, you want to cool them as quickly as possible to avoid then becoming mushy. 


Screw on the lid and place the lidded jar in an ice bath. 


Place the jar in the refrigerator for at least 8 hours. I think the crunch really sets in by that point. Enjoy these banana pepper rings on sandwiches, salads, with cheese and crackers, on chili, or straight out of the jar. Although they will last for a very long time, mine won’t live out this week. 

Happy crunching and munching,

Jenna 🙂

Chopped Kale Salad with Tumeric Basil Vinaigrette & My Much Needed Metamorphosis 

 
I’ll preface this post by saying that if you’re only here for the totally amazing kale salad recipe, go ahead a skip down the page. I won’t be offended. I promise.

For the rest of you, if you don’t remember me, let me reintroduce myself. I’m Jenna. I garden, I cook, I eat, I own a business, and I write about all of it. I’ve been away from blogging for a bit because I’ve been reevaluating things. I’ve decided to quit my job in academia to pursue my business, Happy-Go-Lucky Foods, full-time, we’ve moved to the mountains of Western North Carolina, and I’ve been eating a gluten-free and dairy-free diet. Because of some “lady issues,” my acupuncturist, Doctor of Oriental Medicine, and friend (all the same person) advised me to change my diet (on top of the Chinese herbs I take daily). It’s been about six months and I’m feeling great. My primarily vegan diet has helped me so much, and I wanted to learn to cook all over again. So here I am. I’m back. I’m different, but I’m back. It’s nice to see you. 
I may be a little rusty at this whole food blogging thing, but here goes…

I’ve been eating tons and tons of fresh produce. From squash to tomatoes to beans, corn, grapes, and kale, I’ve been a total veggie glutton. And living in the Asheville area, I’m so fortunate to have it all at my fingertips. Organic, fresh, local produce perfection is all here, and I couldn’t be more excited. Sometimes, I get a little overzealous, though, and buy more than I can chew. This is totally fine, though, because I get to be extra creative. An overstocked fridge with a spectrum of veggies (some cooked) and an unbridled sense of kitchen adventure led me to my new favorite salad. Are you ready?

For this healthy monster, you’ll need:

  • A couple handfuls of kale, chopped into small pieces 
  • Palmful of cherry tomatoes, halved
  • Small but of purple onion, diced
  • A few fresh green beans of any variety, cut in small bits
  • Corn, cooked and cut from the cob, about two tablespoons
  • A smidgen of fresh or pickled jalapeños (add as much as you like if you’re brave)
  • Several chunks of roasted and cubed sweet potato (I roasted these babies for soup, but couldn’t help myself)
  • Two tablespoons of the dressing that follows
  • Mixed nuts for a crunchy garnish

  
For the dressing, you’ll need:

  • 1/2 cup extra virgin olive oil
  • 1/4 cup plain rice vinegar
  • 1 tablespoon ground turmeric
  • 1 teaspoon kosher salt
  • 1 teaspoon honey
  • Several grinds fresh black pepper
  • Pinch dried basil
  1. Place all ingredients in a ball jar and shake like crazy. If you don’t have ball jars falling out of every cabinet like I do, use whatever you have. That’s all there is to it. The turmeric gives the dressing the most gorgeous color and the smell is to die for.

  
Now for the fun part, toss the salad with the dressing, and eat. You’ll have plenty of dressing leftover, but you won’t be able to keep your paws off it. It’s good. It’s really good. 

Kale and turmeric and super foods, and the rest isn’t so shabby either. Food like this makes me forget that I’m eating vegan. I don’t want for anything.

Happy and healthy munching, my friends. I’ll talk to you soon.

Easy Peasy Garlicky Roasted Ichiban Eggplant 

Too much eggplant? No such thing. But should this situation arise in your garden, I suggest you roast it.

First, and on a total side note, I find it awkward to tell people about my “eggplant plants.” It sounds weird and redundant. I accidentally find myself talking about my “egg-plants,” but there (sadly) aren’t eggs growing on them. Turns out, eggs come from chickens and other assorted animals. I can’t be the only one who’s experienced this. It’s a minor crisis, I know, but still worth the cathartic rant.

Now onto the roasted tasty discs of eggplant…

Take as many eggplants as you want. The more the merrier, and they roast down to an iota of their original some.

Cut them in 1″ discs and lay them out on a baking pan in a single layer.

Lightly coat them with a flavorful olive oil and sprinkle them with salt and pepper. Add a clove or two of finely minced garlic and toss around to spread the garlic love around. Don’t leave anybody out. (On a side note, beware with how much salt you use because the eggplant will shrink when the water content evaporates and the flavors, including salt, will concentrate and intensify.)


Put into a preheated 375 degree oven and roast for about 20-25 minutes. Be sure to peek in at about the halfway mark to make sure things aren’t going from delicious to burned. If your cook’s intuition is telling you the oven is too hot, reduce it to 350 and be vigilant.

I like to serve this eggplant as a side dish or add to a salad once it’s chilled. Or, as in the case the other night, I eat it before I can even take a photo of it. It’s so darn good.

Happy gardening and blissful eating to you!

Until next time,

Jenna

The Little Gardener that Could…Stop Being So Darn Stubborn

Happy Spring, everyone! I hope you’re all having lots of organic gardening successes and very few failures this season. But, if you’ve had one or two boo boos, I hope you’re writing them down as to not repeat them next year. I talk from experience, and I’ve certainly had my share of wretched mistakes. Occasionally, I’m stubborn (*wink wink*). But I’m growing as a gardener, steward of our planet, and as a rational human being. Learning from past failure is the reason for this post. Truthfully, I was afraid to write about this too soon. There was no way I’d jinx our success. But it happened, everyone, it finally happened. Houston, we have cucumbers…two kinds!

Screen Shot 2015-05-06 at 9.53.50 AM

This is a truly momentous occasion.

The Cross-Country Hybrids and Poinsett 76 cucumbers started out like any other: little, teeny tiny, cukes with unpollinated flowers at the end.

Screen Shot 2015-05-06 at 9.54.36 AM

Isn’t it cute?

We were excited. But we knew, oh, we knew, not to get too excited. You see, we’ve tried this three years in a row at different times of the year, different gardening seasons, and different locations in our gardens. Every time (except for the one freak-volunteer-plant-in-January incident), we get both pickleworm and melonworm plus a lovely case of downy mildew. And this time was looking to be no different.

Screen Shot 2015-05-06 at 9.54.58 AM

See the little jerks? Pickleworms were already invading.

But, as several people have told me to do, I finally broke down and got some Bacillus Thuringiensis (BT). And it’s my hero, my knight in shining armor, and my bestest buddy. BT a soil-dwelling bacteria that kills the worm larvae that make growing anything in the curcurbita family nearly impossible in our region. From squash to melons to cucumbers, it’ll work. And it’s OK for organic gardening, safe to beneficial insects (including bees), humans, and other animals. The one drawback that I see is that it degrades in sunlight and has to be reapplied often. It’s time consuming, but it’s saved our cucumber crops.

Screen Shot 2015-05-06 at 9.54.09 AM

Cucumber Vines Basking in the Florida Sunshine

To treat, I spray all areas of the plants, but I especially focus on the new growth and flowers because that’s where we’ve found the most damage in the past. The pickleworm and melonworm moths lay their eggs around sundown and are active for only a few hours, but they lay enough eggs that hatch enough larvae to really cause some serious damage. Most of the time, the damage is so bad by the time it’s noticed that there’s no solution other than to rip out and discard the infested plants. I’ve literally cried over this. But not this year (not yet, anyway).

Screen Shot 2015-05-06 at 9.54.24 AM

Cross-Country Hybrid Cucumber

We’ve been harvesting quite a few perfectly shaped, sweet as sugar cukes a couple times a week. It almost seems too good to be true. I’ll bask in this glory for as long as I can. I’ll show off my cucumbers to my fellow vendors at the farmers market, and bite into one every single day. So, friends, the moral of this little story is to stop being stubborn. Don’t repeat the same mistakes season after season, and don’t give up! Listen to the seasoned gardeners around you and take their advice. And enjoy the fruits (and veggies) of your labor.

With dirty fingernails and an armful of cucumbers,

Jenna