DIY for a Happy, Healthy, Juicy 2014

20140102-115134.jpg

Florida winters bring an abundance of gorgeous, colorful citrus to our farmers markets, and my friend Craig at the City Island Farmer’s Market in Daytona Beach has the best. He’s been in the citrus business his whole life and really knows his stuff. Depending on the week and what’s perfectly ripe (according to sugar content), he’ll have tangerines, tangelos, red grapefruits, white grapefruits, pineapple oranges, red navels, and honeybells, among others. And while I love to slice or peel and eat, I absolutely love to make fresh-squeezed juice. It’s fun to mix and match the varieties and get blends impossible to find in stores. Besides, there’s nothing like local.

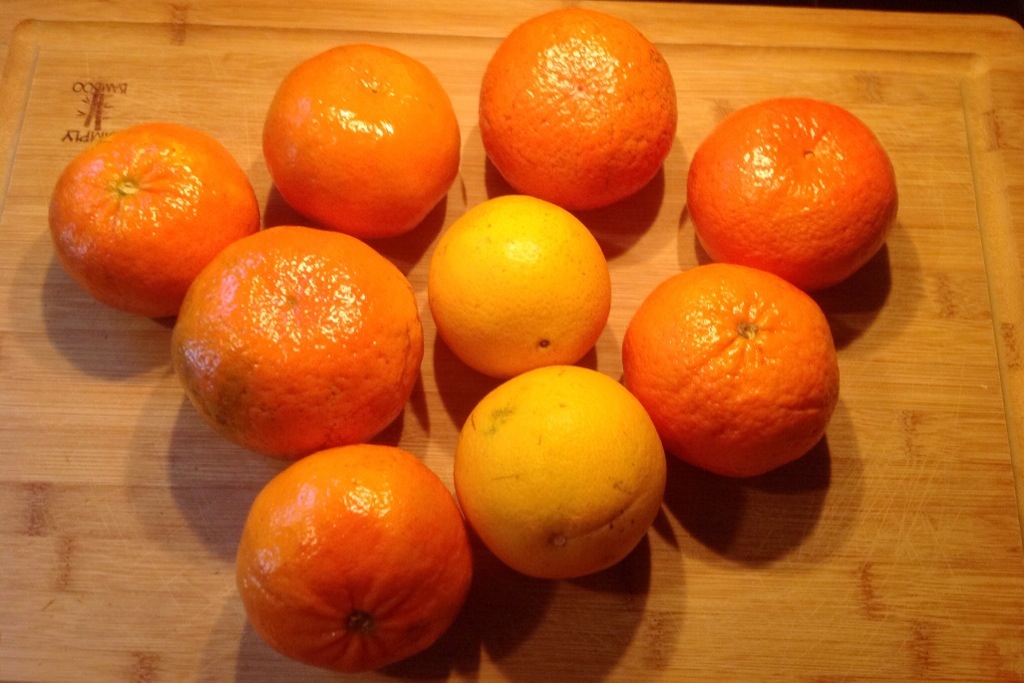
This week, I squeezed sun glow tangerines and a couple of red navels, and it’s so simple to do. I use a small electric home juicer by Black & Decker that allows me to control the amount of pulp. I like next to no pulp and it does a good job of keeping the stuff out.

If you’re considering juicing citrus at home yourself, here’s some basic steps:

Gather up your favorite citrus fruits (go local if you can) and don’t forget to wash the skins.

20140102-114658.jpg

Slice each fruit down the middle but not from the stem end. Avoid cutting through the poles.

20140102-114825.jpg

Plug in your juicer and set it to the amount of pulp passage you desire. Get to juicing!

20140102-114930.jpg

Remember to rinse the grates out when it get’s too gunky. Being clogged only makes the juice harder to filter down to the receptacle.

Pour it in a pretty jar.

20140102-115134.jpg

Compost the skins, and enjoy your delicious juice!

20140102-115908.jpg

Starting Pepper Plants Indoors for Florida Fall Gardening

Florida gardening is unique. We don’t winter over, so pests run rampant for most of the year. Starting seeds outdoors for things like peppers and tomatoes have proved unsuccessful (for me, at least). So I’ve really taken to starting plants indoors to make sure I’m planting healthy, hardened off, and well-adjusted plants in my garden. I like to give them a lot of TLC as I give them a head start. Also, I don’t have a lot of space, so I’ve got little room for error.

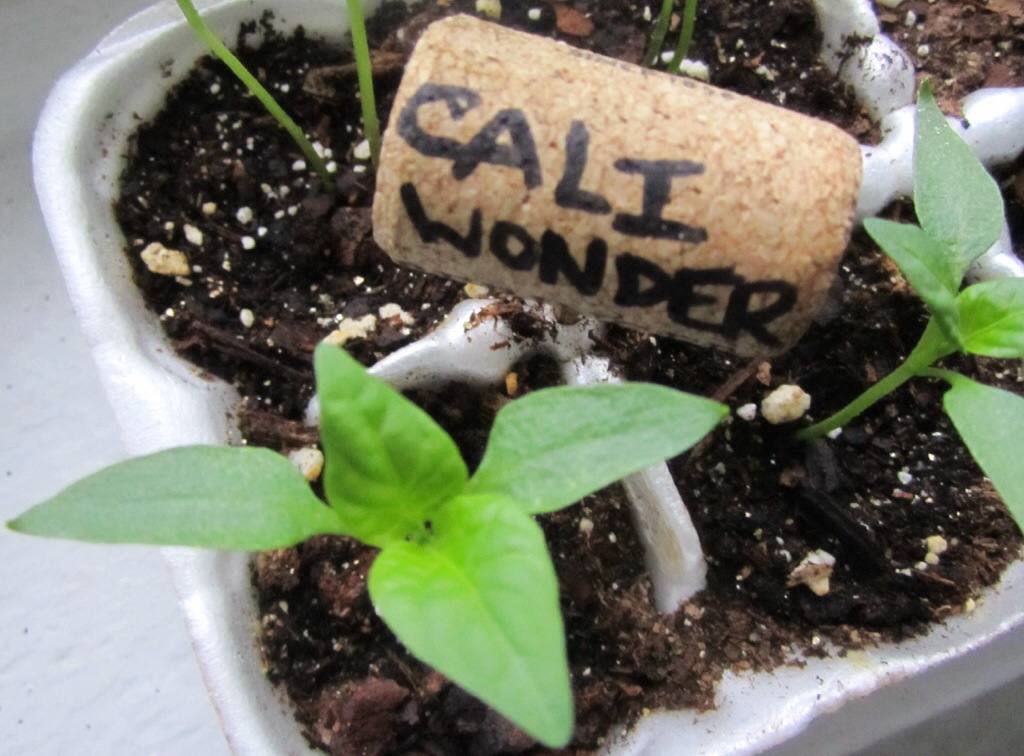
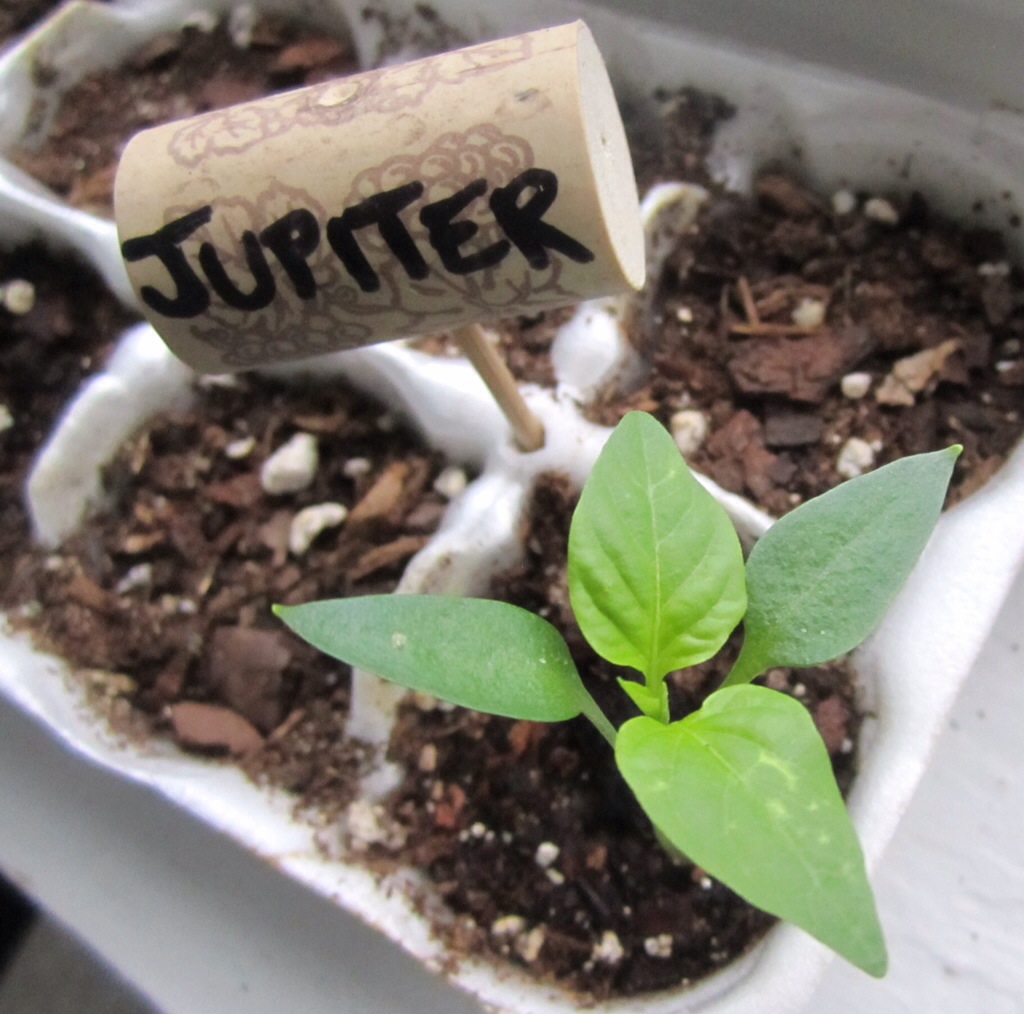
About three weeks ago, I began the indoor seed-starting project. Using a clean and sterilized a clean egg carton, I put some Miracle Gro seed starting mix in each compartment. I sewed four heirloom non-GMO Jupiter pepper seeds from Southern a Exposure Seed Co., four heirloom non-GMO Doe Hill pepper seeds from Southern Exposure Seed Co., and four California Wonder pepper seeds from Ferry-Morse. I marked the varieties with used wine corks on a bamboo skewer, so I’d know what I had growing. Yay, upcycling!

Humidity is very beneficial for seed germination, so I used a tray with a humidity dome that I got from my local gardening supply store. I placed the egg carton inside, sprayed each compartment with water from a clean spray bottle, put on the humidity dome, and placed the whole shebang in a sunny indoor location. I checked them and watered them lightly each day. This was the first adorable sprout that came up after about a week:

20130926-094716.jpg

I removed the dome after mostly all of the seeds germinated and popped up their little green heads. Sunlight would be their ally at this point. This is them two weeks later on my windowsill:

20130926-094939.jpg

As you can see, not all of the seeds germinated. All of the California Wonder seeds came up, though. I really wonder why they’re so dependable (maybe I should be afraid to ask?). Here are photos of each seedling variety:

20130926-100230.jpg

20130926-100241.jpg

20130926-100257.jpg

I’ll be potting up each of the babies this weekend, and when they’re about 6-8 inches above the soil line, I’ll start hardening them off little by little to get them acclimated to the outdoors. I’ll be sure to post on their progress, and, please, wish me luck in the meantime!

Happy gardening, everyone!

Quick, Delicious, and Healthy Gluten-Free, Vegan Black Bean Soup

I know I shouldn’t be focusing on anything in yoga other then my practice in the present, but I was thinking about soup…creamy, delicious, organic black bean soup. I was so hungry! As soon as I got in my car, I planned the execution of this soup and mentally inventoried everything in my pantry to be sure I didn’t have to stop at the store on my way home. Normally, I’d start from organic dried beans, but I always have some canned ones on hand for times like this. Thank goodness. Here’s to having a well-stocked pantry and a garden full of peppers!

For this quick and easy black bean soup, you’ll need:

  • 4 cans organic low-sodium black beans
  • 1/2 large onion, diced
  • 4 cloves garlic, thinly sliced
  • 4 cubanelle peppers, diced (you can also use two medium bell peppers)
  • 1 jalapeño sliced (you can remove the seeds and ribs to limit the heat if you want)
  • Olive oil
  • Sea salt, to taste
  • Cracked black pepper, to taste
  • 1 tablespoon cumin
  • 1 tablespoon chili Powder
  • 2 teaspoons Adobo seasoning
  • 1 whole bay leaf
  • Dried oregano
  • Water

To begin, dice your peppers, onion, and garlic if you haven’t alredy.

20130912-125232.jpg
Heat 1 tablespoon of olive oil in a large lidded pot over medium-high heat. NOTE: I always use my enameled cast iron pot because it traps so much heat and leads to quicker cooking times.

20130912-125115.jpg
Add your garlic to the oil and let cook for about 30 seconds. Don’t let it burn.

20130912-125431.jpg
Add the peppers and onion to the pot and give it a quick stir. Add a small pinch of sea salt.

20130912-125636.jpg
Sauté for five minutes while frequently moving around the pan.
Now add the beans, liquid and all, and one can of water. NOTE: I would have added veggie stock if I had some, but water works just fine. Add all your spices, give it a good stir.

20130912-125818.jpg
Turn the heat down to low, put on the lid, and let it simmer for about a half hour. When you take off the lid, give it a good stir. The soup should have thickened.

20130912-150056.jpg
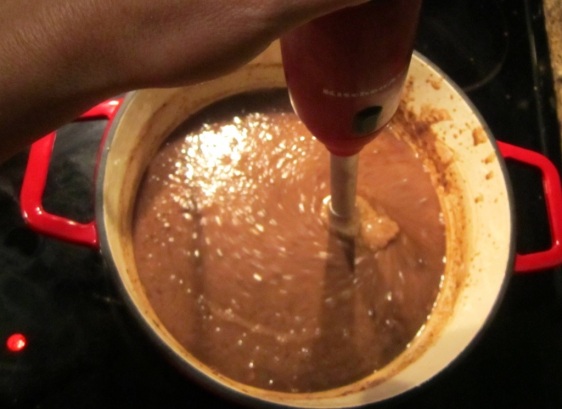
The soup could be eaten just like this, but I like to purée half with my immersion blender. To do this, ladle out half off of the soup into a separate bowl, plug in your stick blender, and let it rip! Remove the bay leaf before this step.

20130912-152711.jpg
It’ll be thick with a wonderfully creamy texture.

20130912-152935.jpg
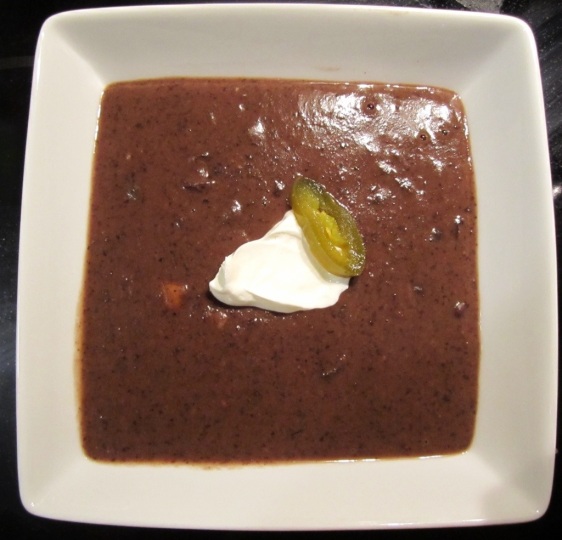
Add back the bean soup that you separated, simmer for about five minutes, adjust the seasonings, and eat! I like to garnish mine with a dollop of sour cream and pickled jalapeños. Feel free to eat this with some tortilla chips for a bit of crunch.

20130912-153247.jpg

Pho Saigon Vietnamese Restaurant is an Unexpected Hidden Gem

Blink at the wrong time and you just may miss Pho Saigon. It’s tucked away just off of International Speedway Boulevard and practically hidden behind a coin shop. But, keep your eyes open, park your car, and venture in.

Inside of this larger-than-it-looks building is friendly and knowledgable staff, a clean environment, and fresh, flavorful, authentic Vietnamese food. I’ve eaten here more than ten times, and, every time, I’m pleased as punch. I ate there with a group of girlfriends this week and got the Pho Hoac Mi Hoang Thanh (egg noodles, wontons, and vegetables in chicken broth). As you can see from the photo, the soup is packed with goodies. This is one of my very favorite dishes at Pho Saigon. The veggies are crisp and beautiful, and the broth is absolutely drinkable!

20130830-133918.jpg
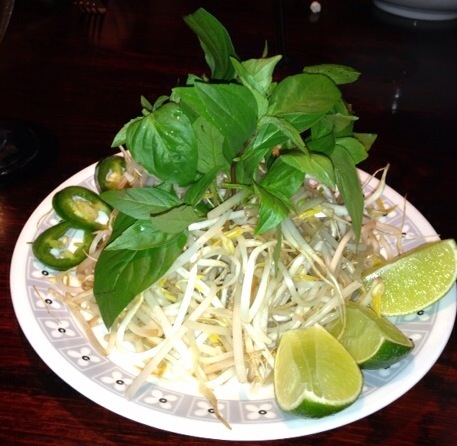
They even serve it with the traditional accouterments: tons of fresh bean sprouts, Vietnamese basil, hot pepper rings, and lime. By the way, they even grow the herbs outside!

20130830-134148.jpg
And even though their name has “Pho” in it, the menu doesn’t stop there. My boyfriend loves the clay pot meals. Essentially, it’s perfectly fried jasmine rice with any number of additions cooked in a clay pot (duh!). He loves the Com Tay Com Ga (chicken and vegetables with crispy rice) and gets it with curry spice and plenty of heat. The rice that sticks to the bottom of the pot is the best part! I act like I’ve never tried it and ask to “try it” every single time. He’s on to me.

If you’re in the area or I’ve made you hungry enough to fly into our local airport to get some Vietnamese food, you can check out Pho Saigon’s website for their menu.

Black Bean and Chick Pea Salad: Protein-Packed and Delicious!


20130820-173456.jpgI’ve recently been eating a ton of legumes. I love how versatile they are and how easy they are to have on hand. I keep them dried in my pantry and even a few cans of organic, low-sodium options for when I’m in a rush. And, when it’s this stinking hot outside, a cold bean salad is a fantastic option for a light lunch or BBQ side dish. When I initially began throwing this together, I wasn’t sure I should blog it right away without getting feedback from my brutally honest friends. Well, it passed the test over the weekend, and I’ve even enjoyed toying around with the leftovers. Moral of the story? I’m now confident enough to share it with you today.

For this recipe you’ll need:

  • 4 cups garbanzo beans (chick peas), drained and rinsed
  • 1 cup black beans, drained and rinsed
  • 2 green cubanelle or small green bell peppers, diced or julienned
  • 1 brightly colored bell pepper, diced or julienned (I chose purple)
  • 1/2 sweet onion, diced
  • 1 jalapeño or other hot pepper, finely diced (remove ribs and seeds to keep heat down)
  • zest of one organic lemon
  • 1 teaspoon sea salt
  • few grinds black pepper
  • 2 tablespoons of garlic infused EVOO (use plain if you don’t have this)
  • 1 tablespoon red wine vinegar
  • 1 teaspoon local honey
  • 1 minced garlic clove (if you haven’t used garlic-infused EVOO)

Add all ingredients to a large mixing bowl, fold gently, and let marinate for at least an hour before eating. This recipe should serve about 10 small portions.

20130820-174353.jpg

Tweaks for cheese and meat lovers:

I added a bit of feta cheese and though it was a perfect addition. My boyfriend had it with feta and grilled chicken and thought it made a perfect lunch on a hot day.

Happy eating!


Today’s Impromptu Lunch: The “Not in Public” Turkey Burger

After a morning of running around, I got home, opened the fridge, and realized I had an abnormal amount of leftovers. This could only mean one thing: I wasn’t going to be making anything new until I cleaned out some of the weekend’s goodies. (side note: My grandmother never said “leftovers.” She called them “pre-cooked meals.)

I was in the mood for some sort of sandwich. After all, my honey made delicious Italian herb bread. But I wasn’t in the mood for ham or tuna. Then I spotted the turkey burgers. But I didn’t have buns. Could I? Could I possibly? Could I possibly put the burger patty on bread? I’m a lover of good buns (haha), so eating a patty on bread is nearly sacrilege. But I decided to give it a whirl. I toasted the bread, slathered both sides with full fat Hellmann’s mayo, added the patty, got out the leftover salad, used the lettuce, tomato, and onion, put on some pickled jalapeños, added some ketchup and mustard, and voila! Look, I’m aware this was a sloppy sandwich with maybe far too many condiments, but since i was already using bread, I figured wild accoutrement abandon was in order. And this is why I’ve named this beast the “not in public” turkey burger. If you saw my face after just one bite, the name would make perfect sense. 🙂

20130819-153422.jpg

Straight from the City Island Farmer’s Market: Purple Bell Peppers

Yesterday, I scored big time at my local City Island (in Daytona Beach, Florida) Farmer’s Market. I found the most gorgeous, locally-grown purple bell peppers. I got 5 for $2! I used them in a garbanzo and black bean salad that I’ll be posting about later today, but I really thought that these beauties deserved a post all their own. Yummy.

20130818-093610.jpg

Nothing Beats Local, Farm-Raised, Low Carbon Footprint, Free-Range Eggs

There’s something about real eggs. Eggs can be truly glorious. And when I say eggs, I’m not talking about the slimy junk in containers or the thin-shelled, vitamin-deficient yellow blobs that come from conventional chicken farms hundreds of miles away. I mean EGGS…the kind that still have a bit of dirt on their shells, the ones that don’t look like they’ve been photoshopped to shiny white perfection, and the kind that come from a person you might even know. I got these yesterday at my farmers market.

20130707-152919.jpg
Local eggs are becoming more en vogue, and it’s a great time to start appreciating their many benefits. They taste better, are better quality, they carry a much lower carbon footprint, and they’ve got more of the good stuff we want (vitamins E and A, Omega 3, beta carotene) and less of the bad stuff we don’t (cholesterol and saturated fat). Many people are hesitant to purchase local eggs because of the higher price tag these eggs carry. But buying better quality food, like local eggs, will save money in the long run because they’re better for you. If that’s not enough for you, then think about the higher quality of life the chickens have. I swear I can taste the happy! Look at the orangey color of these yolks!

20130707-153114.jpg
I know the run-of-the-mill stuff from your grocery store might cost a bit less, but don’t let fifty cents make your decision. And, please don’t tell me you can’t get them. If I can get them in Daytona Beach, then I’m confident that you can find them in your town. And if you can’t, I’ll be glad to help. I’m serious.

Furthermore, local food, eggs, veggies, etc. is better for our Earth. Here’s the carbon footprint comparison between a dozen local and a dozen store-bought eggs (you can go to CleanMetrics to do this on your own, too):

Eggs from 25 miles away: 0.02 Kg of CO2e
Eggs from 1,164 miles away: 0.12 Kg of CO2e

Essentially, there’s a 600% increase in carbon emissions from transport. No bueno.

Quality food is an investment in yourself. Not only does it make better tasting dishes, but it makes you feel better, too. Local food is an investment in your local community, literally. It puts a human face on where your food comes from and keeps your dollars where they will do the most good for you, in the places of your daily life.

I strongly encourage you to seek out the growers and farmers in your neighborhood while making a meaningful investment in your future self.

Organic Beef Chili Over Baked Oven Fries

When I was a little kid, my dad and I used to have friday night daddy-daughter bowling dates at our local Don Carter’s bowling alley. We used to laugh, bowl, and, best of all, eat chili cheese fries. I have fond memories of crispy deep fried french fries buried underneath gooey liquid cheese and (most likely) canned chili. I loved it. I really did. You see, growing up and becoming electively conscious of the food choices I make and, more importantly, where my food comes from is a double-edged sword. I can’t eat that that stuff anymore. But…I can make all of the naughty treats I loved as a kid in a more healthful way.

You can do this, too. Trust me. To mimic our chili cheese fries, you need to make chili. Whether you go full on cow or totally vegetarian, the secret is lots of spices and slow cooking for a very long time.

For the chili:

I like to use grass-fed organic ground beef. I prefer a 90-10 fat to meat ratio. I brown It in a Dutch oven, drain it, and set it aside. I then put a small amount of canola oil in the skillet and brown one cup diced onion one cup diced bell pepper over medium-high heat. (If you’re like me and like it spicy, add some fresh or pickled jalapeños, too.) When the veggies are nice and brown, but not mushy, add four large cloves of minced garlic. Cook for about a minute and then add the meat back to the pan. Add two tablespoons of chili powder, one tablespoon of cumin, cayenne pepper, garlic powder, salt, and black pepper to taste, and mix well. Then add two 14 ounce cans of your favorite organic diced tomatoes with all the liquid. Add two tablespoons of tomato paste and mix again. Bring to a simmer. You should have enough liquid to cover about half of the ingredients. If you don’t, add a bit of water. Let this cook in a your covered dutch oven or other heavy lidded cooking vessel for about a half hour at a low simmer. Then add one can of black beans and a small package of frozen sweet corn. Continue to simmer for at least another hour. Taste and adjust the spice and salt levels to taste.

For the fries:

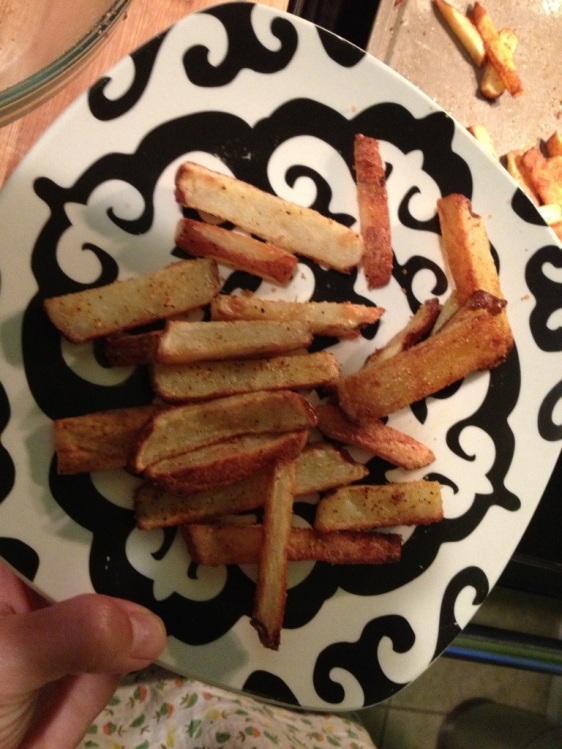
Preheat your oven to 425 degrees. Cut your favorite potatoes into thick planks and soak them in cold water to draw out some of the starch and prevent from browning. Next, dry them on a clean kitchen towel. Toss them with a bit of canola oil and a pinch of salt. Put on a non-stick cookie sheet and bake on the center rack for about 20 minutes (or until brown on the edges). Remove from the oven and toss again with your favorite spices. I like to use garlic powder, salt, and pepper, but get creative if you want! Potatoes are a great blank canvas. (Feel free to ask me for suggestions!) Once you’ve seasoned your fries, put them back in your 425 oven until the fries are crispy and brown.

20130522-190853.jpg

Now for the best part:

Put a heaping pile of fries on a plate, top with a massive helping of your healthful and protein-laden chili, and shred some of your favorite cheese over the top. I love sharp Vermont cheddar, but you could use pepper jack, Colby, or whatever you prefer. Pop in the microwave just long enough to melt the cheese, grab a fork, and dive in. You will be so very happy you did.

20130522-190749.jpg